


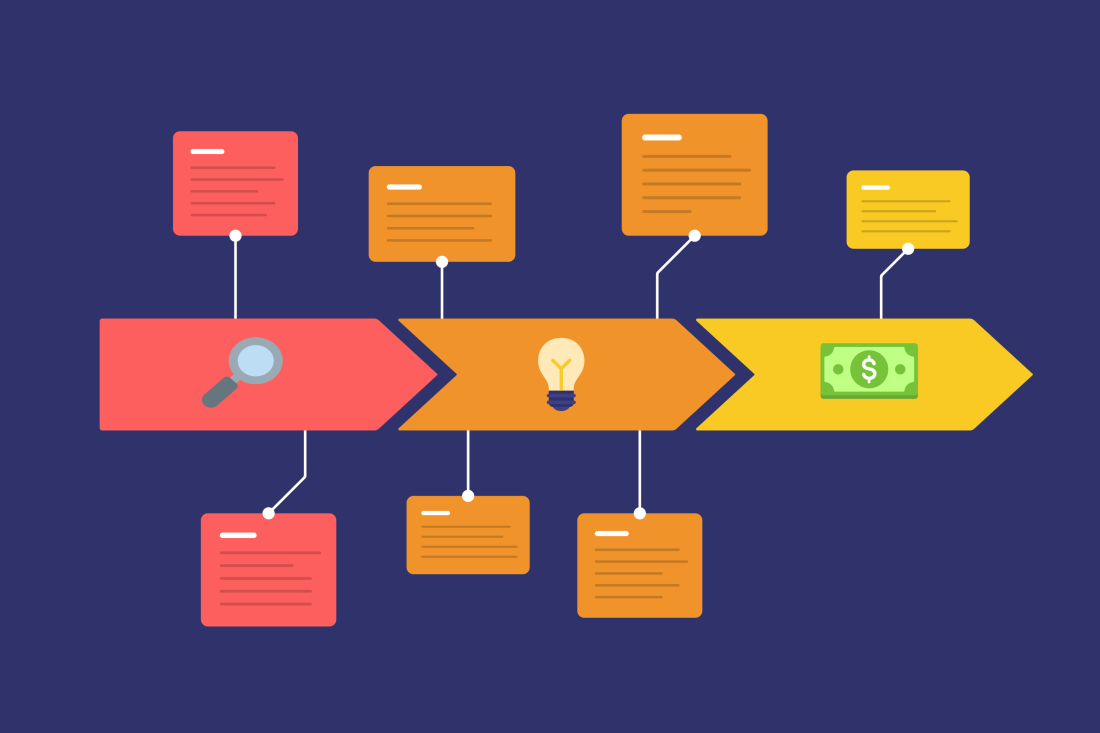
You've built the onboarding flow. Run it by the team, shipped it, watched cohort after cohort stall at the same stage. When the activation rate doesn't move, the problem is usually the same: nobody mapped which trigger fires when users get stuck.
Most journey maps end as slide decks. The version worth building does one extra thing: it specifies what fires when users stall (a specific trigger, a specific experience type), and that specification is what turns the artifact into a live product experience. This guide covers how to build one that does both.
The TL;DR
-
An onboarding journey map is a structured document that traces a new user's path from sign-up to first value, capturing each touchpoint, the friction at every stage, and the behavioral signals that show whether they're advancing toward activation or stalling.
-
Every stage in the map needs a behavioral trigger and an assigned experience type. Without both, the map describes what should happen but nothing in the product knows to make it happen.
-
Define four events that mandate a map revision — feature launch, KPI drop, new segment, invalidated A/B result — and build a versioning convention in from day one.
-
The execution gap is where most journey maps fail. Tiers 1 and 2 (map creation and data input) produce documentation. Tier 3 (in-product execution) is what makes the map real for users.
What is an onboarding journey map?
An onboarding journey map is a visual and structured document that traces a new user's path from sign-up to first value, capturing the touchpoints they encounter, the friction they experience at each stage, and the behavioral signals that indicate whether they're moving forward or stalling.
Search results conflate two distinct versions of this map. A customer or user onboarding journey map covers the product experience from first login to activation. An employee onboarding journey map tracks a new hire from offer acceptance through their first 90 days. Different audience, different milestones, different execution layer, though the underlying framework is similar. This article is about the product side.
A customer journey map spans the full lifecycle, from awareness through renewal. An onboarding journey map is narrower by design: it covers only the activation window, and the output isn't a lifecycle overview. The output is a friction inventory paired with a trigger specification. Where users stall, and what fires to move them forward.
Teams build this map because the alternative — discovering where users stall through churn data or support tickets — is always three cohorts too late.
Onboarding journey map vs. process map: what's the difference?
A process map documents operational steps: who does what, in what order, and what handoff occurs at each stage. It's built for internal teams to audit workflows and assign ownership.
A journey map documents the user's experience: what they encounter at each stage, how they feel about it, and where they get stuck. Its audience is the product and UX team, and its output is a friction inventory.
| Process map | Journey map | |
|---|---|---|
| What it captures | Internal tasks and handoffs | User experience and friction |
| Primary audience | Ops and engineering teams | Product and UX teams |
| Primary output | SOP document | Friction inventory |
| When each stage ends | Internal task completed | User behavior milestone reached |
Product teams need both, and the distinction matters in practice. Process maps govern the internal handoffs: when CS marks the setup call complete, when the integration sequence kicks off, when the email trigger fires. Journey maps govern what the user encounters at those same moments. When teams conflate them, they run a process audit and wonder why the activation rate didn’t move.
Consider the CS-to-product transition at the integration stage: the process map governs the internal trigger — when CS marks the setup call complete and hands off to the product team. The journey map governs what the user experiences at that same moment: whether a guided Tour fires for the integration workflow, whether a Tooltip appears at the connection element, and whether the activation checklist updates to reflect their progress.
What does an onboarding journey map include?
A customer onboarding journey map includes seven core components. The first five are what most maps have. The last two are what most teams skip, which is why most journey maps become shelf documents within six months of launch.
- User persona profile: the specific user segment this map describes, including activation goal, technical proficiency, primary job-to-be-done in week one, and the behavioral event that signals first value.
- Journey stages with entry and exit criteria: the discrete phases of the onboarding path (sign-up, setup, first key action, activation), each with a defined user behavior that marks the start and end of the stage.
- Touchpoints per stage: every interaction the user has with your product, team, or communications at that stage, including in-app experiences, emails, and CS handoffs.
- Emotional state indicators: signals of friction (confusion, drop-off, support ticket submission) and delight (fast task completion, voluntary exploration) that characterize how users feel at each stage.
- Pain points inventory: specific friction points identified at each touchpoint, ranked by severity.
- Activation KPIs per stage: the measurable outcome that defines success for each stage, whether that's time to first key action, feature adoption rate at day 7, or stage completion rate by cohort.
- Owner assignment: the team or individual responsible for monitoring and improving each stage.
45% of customer onboarding teams still grapple with siloed tools and information, preventing consistent journey execution across touchpoints. Without owner assignment in the map itself, accountability defaults to whoever notices the problem last.
Benefits of creating an onboarding journey map
Building a journey map does something most onboarding audits miss: it surfaces where users stall before the team would otherwise detect it through support tickets or churn analysis. That's the diagnostic benefit, and it's the one that justifies the time investment.
64% of onboarding teams identified enhancing customer experience as their top onboarding priority for 2025, above all other operational goals. A journey map is the instrument that makes that priority actionable rather than aspirational.
From that diagnostic foundation, more execution-layer benefits compound.
It turns the map into a trigger specification. When built to the full component spec, including activation KPIs and owner assignment per stage, the journey map tells the product exactly which intervention fires at which behavioral signal. Chameleon's Benchmark Report shows why sequence matters: checklists with a welcome state hit 27% CTR, and tours launched from a checklist see 67% completion — numbers that only appear when the full touchpoint sequence is coordinated.
It exposes the gap between stated design intent and observed user behavior. Teams regularly discover that the stage they thought was easy (integration setup) has the highest drop-off, while the stage they thought was hard (first key action) completes cleanly. The data in the map corrects the assumption before another quarter of cohorts confirms it.
It ends the guessing game between functions. Before a shared map exists, CS doesn’t know which in-product experience preceded their handoff call, and Product doesn’t know which email triggered the return visit. Each function optimizes the slice of the journey it can see. Activation friction accumulates at the handoffs, in the gaps between those slices, where nobody has a view and nobody has ownership.
In practice, journey mapping often surfaces a different bottleneck than the one teams assume. Teams repeatedly tell us the same story: several sprints spent optimizing the integration touchpoint — because that's where internal data shows the longest time-on-page — while the real drop-off sits two stages earlier, at first key action, where most users abandon within 24 hours. Without a map connecting that behavioral signal to a missing touchpoint in the sign-up-to-first-action stage, those sprints optimize the wrong problem.
Chameleon co-founder Pulkit Agarwal notes that maps drive adoption only when every stage has a behavioral trigger attached to a live in-product experience — without that wiring, the artifact stays documentation.
6 steps to create an onboarding journey map
The six steps below produce two outputs simultaneously: a diagnostic artifact that shows where users stall, and a trigger specification that tells the product what to do about it. Most how-to guides on journey mapping produce only the first.
These steps apply to both customer and user onboarding journey maps. Step 1 explains when to build separate maps for distinct user segments, because personalized onboarding, which 68% of onboarding professionals rate as Very Important for effective onboarding, only happens when the map specifies which users get which journey.
- Define user personas (and decide when to fork the map by segment) — produces a segmented persona profile for each distinct activation goal, including the behavioral event that signals first value for that user type.
- Outline user goals and needs (distinguishing stated goals from activation goals) — produces the activation event that becomes the exit criterion for every stage in the map.
- Map out the onboarding touchpoints (assigning an experience type to each) — produces a touchpoint inventory with a specific experience type (Tour, Tooltip, Launcher, Microsurvey) assigned to every moment in the journey.
- Identify pain points and opportunities (with a severity triage) — produces a severity-triaged friction inventory mapped to the remediation action each friction type warrants.
- Execute the map in-product (translating each stage into a live trigger condition) — produces live behavioral triggers in the product for every stage the map defines.
- Validate and iterate (against specific behavioral KPIs, not satisfaction scores) — produces a cohort-level decision on whether a problem is a content fix or a structural map change.
1. Define user personas
Persona-first means starting with the people, not the product. But persona definitions for journey maps need more specificity than general marketing personas.
Four fields the journey map specifically requires, distinct from a general marketing persona:
- Activation goal: what does success look like at the end of the onboarding window?
- Technical proficiency: does this user expect a guided walkthrough or a quick reference?
- Primary job-to-be-done in week one: the single most important task they need to complete in your product
- The behavioral event that signals first value: not "completed setup" but "created first [workflow/project/campaign]"
Don't build one composite map that tries to serve all user types. If two segments have materially different activation goals, meaningfully different technical proficiency levels, or different primary jobs-to-be-done in week one, they need separate maps. A single averaged map produces guidance that's too generic for both segments and accurate for neither.
The practical test: segment your user base by persona proxy attributes (role, company size, plan tier) and compare activation rates across those segments. If the rates differ significantly, you have distinct behavioral populations, and each warrants its own map.
Microsurveys at the onboarding entry point give you a way to validate persona assumptions at scale without a separate research sprint. A two-question survey triggered at sign-up collects the ICP signal your targeting data may not have, and the responses tell you which map path to route this user into. See user onboarding best practices for the segmentation patterns that drive activation across mixed-persona cohorts.
2. Outline user goals and needs
Two types of goals need to be defined, and confusing them is one of the most common reasons journey maps break down in execution.
The stated goal is what users say they want at sign-up: "I want to understand how this works" or "I want to get my team set up." These matter, but they're not reliable predictors of retention.
The activation goal is the behavioral event that statistically predicts 30-day retention. Your analytics tool has the answer. Pull cohort retention data and filter by users who hit specific milestones in their first week. The milestone with the sharpest retention difference between completers and non-completers is the one. That inflection point (sometimes it's creating a first project, sometimes completing a key integration, sometimes something less obvious) is what the map is built around. Brian Balfour of Reforge describes this same approach: separating retained users from churned ones by the behaviors they completed in their first week is how teams identify the activation event actually worth building toward.
Once you've defined activation goals for each persona, they become the exit criteria for your map's stages. "Stage complete" means the user has reached the activation milestone for that stage, not that a calendar day has passed or an internal task is finished. This is what makes the stage structure behaviorally grounded rather than operationally defined.
3. Map out the onboarding touchpoints
A touchpoint is any moment where the user interacts with your product, your team, or your communications during the onboarding window. Mapping them gives you two things: the complete inventory of moments where users can advance or stall, and the execution specification for each one.
For each touchpoint, assign an experience type:
- Multi-step workflow introduction: a guided Tour, so the user sees the sequence once with context before exploring independently
- Feature clarification at a specific UI element: a contextual Tooltip, so help appears at the exact moment the user pauses at a confusing element
- Self-serve activation milestone tracking: a Launcher checklist, so users can see where they are in the activation path and pick up where they left off
- Sentiment or friction capture at a key decision point: a Microsurvey, so you collect a real signal at the exact stage you're most interested in measuring
Assigning experience types at this stage turns the touchpoint inventory into a deployment plan, not just documentation.
Touchpoint sequences often need to fork by user segment. Enterprise users frequently require an admin-configuration touchpoint (provisioning, SSO setup, team invitation) that SMB users skip entirely. Map these divergences explicitly, label the condition that triggers the fork (account size, plan tier, admin flag), and specify the touchpoint sequence for each path. For real examples of how SaaS teams structure these touchpoints in production, Chameleon's inspiration gallery shows how teams navigate similar forks.
Include non-product touchpoints too. Activation emails, CS handoff calls, and in-app notifications all appear in the user's experience during onboarding. Any touchpoint the user experiences but the team hasn't mapped is a blindspot: it can't be instrumented, measured, or improved.
At a self-serve activation checkpoint, a Launcher provides what the touchpoint spec calls for: a persistent in-product checklist tied to the activation milestones in the map, surfacing the next step without requiring a CS call or a custom UI build.
4. Identify pain points and opportunities
Pain point identification is primarily a behavioral data exercise. Start with drop-off rates by stage, session recording patterns, and support ticket clustering. Qualitative interviews explain what the data surfaces; they don't replace it.
Once you've collected the pain points, triage them by severity and map each to the experience type that addresses it:
| Severity | Definition | Experience type |
|---|---|---|
| Blocking | User cannot advance to the next stage without resolving | Guided Tour at the friction point |
| Slowing | User advances but time-to-value increases significantly | Contextual Tooltip at the specific UI element |
| Friction-adding | Minor individually, but cumulative impact on activation rate | Microsurvey to validate whether it warrants fixing |
The experience type mapping follows directly from how each friction type manifests. Blocking friction requires a guided Tour because the user needs sequential context across multiple product surfaces to resolve it — a single annotation can't convey the full workflow. Slowing friction requires a Tooltip because the problem is localized to one specific UI element, not an end-to-end sequence. Friction-adding issues warrant a Microsurvey first to confirm the pattern is statistically significant across users before committing a sprint to a fix.
The severity classification does two things. It prioritizes the pain-point list by impact, so the team doesn't spend three sprints fixing a friction-adding issue while a blocking problem persists. It also maps directly to the experience type that addresses it, turning the pain-point inventory into an execution spec.
Chameleon's Microsurvey Insights feature delivers AI-powered pattern detection across in-product feedback, surfacing which friction points are statistically significant versus anecdotally reported. Without it, someone has to read 400 open-ended survey responses and guess which patterns are signal — Microsurvey Insights does that classification automatically, so the next sprint targets the friction that's actually blocking activation, not the one that's loudest in Slack.
5. Execute the map in-product
Most journey maps stop at identification. This step is where the artifact becomes a live product experience.
The translation works across four dimensions: the journey stage becomes the trigger condition, the touchpoint type becomes the experience type, the pain-point severity becomes the remediation logic, and the activation milestone becomes the suppression condition that stops firing guidance once a user has advanced past a stage.
93% of organizations view automation as critical for onboarding success, yet only 25% have fully automated their onboarding processes. The execution gap starts with maps that were never wired to the product.
Here's the stage-to-trigger mapping:
| Onboarding stage | Behavioral signal | Experience type |
|---|---|---|
| Sign-up complete | Account created, no key action taken | Welcome Tour or modal |
| First key action | User navigates to primary feature area | Guided Tour for the core workflow |
| Integration configured | Integration page visited but not completed | Tooltip at the integration element |
| Activation milestone reached | User completes the activation event | Launcher checklist dismisses; Microsurvey fires for sentiment capture |
Behavioral rules make execution adaptive. Triggers must fire on the user's actual behavioral signal (event completed, page visited, time elapsed without action) rather than a fixed schedule. A user who sets up their first integration on day one shouldn't receive the day-three integration reminder. The map's execution layer needs to advance users based on what they've done, not what day it is.
Build in a bypass condition. Users who reach activation faster than the map projects should have redundant guidance suppressed automatically. Check whether the user has already completed the stage milestone before firing the experience. Fast activators shouldn't be penalized with guidance they've already outpaced.
In Chameleon, each experience type is configured with its own behavioral trigger conditions (page visited, event completed, time elapsed without action) without engineering involvement. The rule for each stage is: show experience X when the user meets condition Y and has not already completed milestone Z. For complex setup tasks where users need to watch a workflow executed step by step, Chameleon's Automations feature lets you embed recorded click sequences directly into Tour steps, playing back real in-product interactions in the user's own account — no video production required. For a deeper look, see how to build onboarding that runs without engineering dependencies.
6. Validate and iterate your map
The first validation checkpoint is two weeks post-launch, not to draw conclusions, but to identify early-signal drop-off: stages with unusually high exit rates before the first cohort completes the full journey. These are the stages worth watching before the 30-day data arrives.
At 30 days, run a full cohort analysis against four KPIs:
- Time-to-first-value by cohort
- Activation rate by journey stage
- Drop-off rate at each mapped touchpoint
- Feature adoption rate at 30 days post-onboarding
After the initial 30-day validation, tie the review cadence to the product release cycle. Every feature launch that adds or removes a touchpoint triggers a map review.
When the KPIs show a problem, the fix is structural. There’s a real difference between a content change and a map change, and conflating them is where most validation processes break down. Rewriting tooltip copy takes an afternoon and might move the number by a point. Restructuring the touchpoint sequence for a stage, removing a blocker, or reordering the path is a map change. It takes a sprint. And it’s the only thing that shifts the drop-off curve if the sequence itself is wrong.
If integration-stage drop-off exceeds 40%, rewriting the tooltip copy for that step isn’t the fix. The sequence is broken. The validation checkpoint exists to force that distinction before the team spends three weeks optimizing the wrong layer. For more on managing onboarding at scale across teams as segment count and complexity grow.
How to keep your onboarding journey map current
The initial validation loop gets the map working. What keeps it working is a system for knowing when to update it and what the update must include.
Four events mandate a non-scheduled map revision:
- Feature launch that adds or removes touchpoints: any new feature that intersects the onboarding path changes the touchpoint inventory. The map and its execution layer must update together.
- Activation KPI drop exceeding your defined threshold: if activation rate drops more than five percentage points quarter-over-quarter from the prior cohort baseline, the map's trigger logic for the affected stage needs review, not just the experience content.
- New user segment addition: a new ICP or pricing tier with different activation goals requires a forked path in the map. Adding a segment without forking the map produces a blended journey that serves neither segment well.
- A/B test result that invalidates the original friction hypothesis: if a test shows users complete a stage better without the guided Tour than with it, the map's touchpoint spec for that stage was wrong. Update the map to reflect what the data actually showed.
For versioning, name each map version by the trigger event and date: "v2 - post-SSO launch, Oct 2025." That naming convention tells anyone reading the map what changed, why, and when, without relying on document version history that nobody checks.
This is where map ownership becomes non-negotiable. One person or team must own the update end-to-end, not just the document but the trigger conditions and experience types in the product that reflect it. A revision that only touches the artifact and leaves the execution layer unchanged hasn't actually changed what any user sees. Which is the whole point.
As of 2026, none of the major map-creation platforms — Miro, UXPressia, or Figma — connect the artifact to live trigger conditions; they are built around the map as a point-in-time artifact. That's precisely why most journey maps lose relevance within six months of launch.
How to build a journey-aligned activation checklist
An onboarding checklist is the user-facing output of the map's self-serve touchpoint layer. Each item on the checklist should mirror a touchpoint the map has already defined, using the same language as the map's stage and touchpoint labels.
What makes a checklist journey-map-aligned, as opposed to a generic task list, comes down to three criteria:
- Items use the map's touchpoint language: if the map calls the milestone "integration configured," the checklist item reads "Configure your first integration," not "Set up your account."
- Completion state persists across sessions: a user who completes two checklist items on day one should see those items checked off when they return on day three.
- The checklist dismisses when the user reaches the activation milestone: not when they check off every item, but when the map's exit criterion for the activation stage is met.
The third criterion is the one most teams miss. A checklist that stays visible after a user has already activated adds noise and signals that the product hasn't noticed they've progressed. The map's activation event is the right dismissal trigger.
A Launcher delivers this journey-map-derived checklist in-product at the exact stage the map specifies, with persistent completion state and automatic dismissal at the activation milestone, without a custom UI build. The checklist becomes the bridge between the map artifact and the user's actual day-one experience. See building contextual guidance into your onboarding flow for the delivery patterns that drive completion.
Tools for onboarding journey mapping
Tools for onboarding journey mapping fall into three functional tiers. Knowing where each tier's job ends matters as much as knowing which tools to use.
Tier 1 - Map creation: Miro, Figma, Lucidchart, and dedicated journey-mapping platforms like UXPressia. These produce the visual artifact and allow collaborative editing across teams. Their job ends at the artifact. They don't populate the map with behavioral data, and they don't deliver anything to users.
Tier 2 - Data input: tools that populate the friction inventory with behavioral evidence. Product analytics platforms like Mixpanel and Amplitude supply drop-off and retention data. Session recording tools like FullStory show where users actually stop and what they do instead (which is almost always more informative than the drop-off numbers suggest). In-product survey tools capture sentiment at specific touchpoints. Combined, they tell you what belongs in the map. But they stop at the artifact.
Tier 3 - Execution: the in-product experience platform that takes the map's trigger specifications and makes them live in the product. This tier closes the loop between the artifact and the user experience. Without it, Tiers 1 and 2 produce documentation. The tier structure is the point: a product team that has map creation and data input but no execution layer has a well-documented gap they haven't yet closed.
Chameleon handles the execution tier: Tours for guided multi-step workflows, Launchers for self-serve activation checklists, Tooltips for contextual element-level help, Microsurveys for in-stage feedback capture, and Automations for embedding recorded click sequences into Tour steps to walk users through complex setup tasks without them needing to navigate independently.
Best practices for effective onboarding journey maps
Four best practices separate journey maps that drive adoption from ones that collect dust in a shared drive.
Keep the user at the center
Before finalizing any stage in the map, run this test: are the entry and exit criteria defined by a user behavior event, or by an internal task completion?
"Account setup complete" is an internal status. "User has configured at least one integration" is a user-behavior milestone. These sound similar but produce different maps. The first tracks what your team did; the second tracks what the user did.
If any entry or exit criterion describes an internal action (a CS email sent, an onboarding call scheduled, an admin task completed), rewrite it as the corresponding user behavior.
This test applies not just at initial map creation but during every event-triggered revision. A map update that introduces a new internal-task criterion has regressed toward a process map. Use this test as a review gate every time a revision is triggered by the event conditions described in the section on keeping the map current.
Collaborate across teams
The map layers correspond to what each function can actually see. CS owns the handoff touchpoints and support friction signals. Product owns the in-app behavioral evidence: stage drop-off rates, session patterns, and feature adoption by cohort. Marketing owns the pre-activation email touchpoints and the conversion-to-activation data that shows which email content triggers a return visit.
45% of onboarding teams cite siloed tools as their top execution barrier (Rocketlane, 2025) — the journey map is the shared artifact that resolves it: without it, each function is working from a partial picture, and the friction compounds at the handoffs.
In practice this means running a kickoff with all three functions before building the map, not handing them a draft to comment on afterward. CS brings the support ticket clusters and the handoff friction they hear on every onboarding call. Product brings stage drop-off rates and session recordings. Marketing brings email click-to-activation data. Build the friction inventory from all three simultaneously, because the friction tends to live exactly at the handoffs between functions, invisible to each individual team until you put their data together.
Update your map based on performance
Three performance thresholds trigger a map update: stage drop-off rate exceeds your defined percentage from the prior cohort baseline; time-to-first-value regresses by more than a set number of days; or activation rate declines more than five percentage points quarter-over-quarter.
When one of these thresholds is hit, the first question is whether you need a touchpoint update or a map update. A touchpoint update revises the content or timing of an existing in-product experience: rewrite the Tour copy, adjust the Microsurvey timing, change the Tooltip trigger from hover to click. A map update is structural: restructure a stage, add a touchpoint, remove a redundant step, or fork the path for a new segment.
Teams conflate these two types of work and apply content edits where structural changes are needed. The result is a map that looks current but produces the same drop-off pattern it produced before. For the full operational mechanics of map versioning and ownership, including the versioning convention and propagation requirements, see the section above on keeping the map current.
Assign an execution owner and a behavioral trigger to every stage
Every stage in the map needs two fields most maps omit: an execution owner (the person responsible for monitoring and improving that stage's performance) and a behavioral trigger (the condition that fires the in-product experience for that stage).
Without an owner, nobody acts when the drop-off threshold is crossed. Without a behavioral trigger, the execution layer has no instruction: it doesn't know when to fire the Tour, when to show the checklist, or when to surface the Microsurvey.
Both fields belong in the map document itself. Name the owner in the stage header. Document the trigger condition alongside the touchpoint specification: "User visits integration page and has not completed any integration within 48 hours of account creation." That's a specific, instrumented trigger. Compare it to "when users need help with integrations," which tells the execution layer nothing.
Maps without these two fields are diagnostic artifacts. Maps with them are deployment specifications.
-
An onboarding journey map is a structured document that traces a new user's path from sign-up to first value, capturing each touchpoint, the friction users encounter at every stage, and the behavioral signals that show whether they're advancing toward activation or stalling.
-
Six steps: 1. Define user personas, deciding when to fork the map by segment. 2. Outline activation goals — the behavioral events that predict retention — not just stated goals. 3. Map each onboarding touchpoint and assign an experience type. 4. Identify and triage pain points by severity. 5. Execute the map in-product using behavioral triggers, not fixed schedules. 6. Validate against activation KPIs and iterate based on cohort data.
-
Employee onboarding maps follow a similar structure — stages, touchpoints, friction points — but with HR-defined milestones and a longer activation window. Pre-boarding covers offer acceptance through day-one logistics: equipment, system access, and role context. First days focus on initial orientation, team introductions, and establishing working rhythms. Role-specific training builds job-function skills and tool proficiency against a defined ramp timeline. Team integration marks the shift to independent contribution.
-
A process map documents internal steps and handoffs for operations teams. A journey map documents the user's experience and friction at each stage for product and UX teams. Product teams need both: process maps govern internal sequencing, journey maps govern what users actually encounter at those same moments.
-
A customer onboarding journey map includes: user persona profile, journey stages with entry and exit criteria, touchpoints per stage, emotional state indicators, pain points inventory, activation KPIs per stage, and owner assignment. The last two components are what most teams skip, and their absence is why most maps become shelf documents.
-
Journey mapping surfaces where new users stall before churn data does. It turns onboarding intent into a trigger specification: which in-product experience fires at each stage, and under what behavioral conditions. 64% of onboarding teams named enhancing customer experience their top priority for 2025 — a journey map is what makes that actionable.
Mapping out the route to product adoption with Chameleon
The map specification goes in. The user experience comes out. Most teams build the map but never close that gap — Chameleon is the execution layer that does.
Each touchpoint becomes a Tour for guided workflows, a Launcher for self-serve activation checkpoints, a Tooltip for contextual element-level help, or a Microsurvey for in-stage feedback capture. Each experience type is configured with the behavioral trigger condition the map specifies, without engineering involvement. For complex multi-step setup tasks, Automations let you embed recorded click sequences into Tour steps, walking users through the workflow in their own product account. Once the base map is validated, teams can personalize the journey by role, plan, or use case — the segmentation and targeting layer runs without engineering support.


