


Turn product-qualified leads into paying customers
Turning product-qualified leads (PQLs) into customers is one of the fundamental strategies of product-led growth. PQLs are leads who have used your product during a free trial or freemium plan, and have taken actions that signify that they are getting value from the product and that they’ll likely become a paying customer.
PQLs have a shorter sales cycle and are more likely to convert than MQLs or SQLs, requiring less demos and calls before they’re willing to commit to a purchase. They’re also less likely to churn as they’ve got value from your product early on.
In this recipe, we’ll focus on converting PQLs who have a high activation rate during their trial period. You’ll learn how to:
Target PQLs who have reached an activation milestone with a Chameleon in-app prompt to remind them of the benefits of paying for your tool
Direct those users to book a call in-app with the HubSpot scheduler link
Follow up with those that don’t click to upgrade with personalized email campaigns in HubSpot
Analyze results to track impact on conversions
💡Learn more about how to define PQLs for your business.
Ingredients
A Chameleon account (all plans)
A HubSpot account (all plans)
Step 1: Sync your HubSpot List of “PQLs” with Chameleon
First off, you’ll need to identify what the major activation milestones are for your user — for example loading a page, inviting a colleague, or creating a project.
Once you know what you’re aiming for, you can then create your list in HubSpot and sync it with Chameleon.
To set up HubSpot as a data source, go to integrations in your Chameleon Dashboard, click “Configure” on the HubSpot Integration, and click “Connect” to enable syncing of your lists. You’ll have to connect your account using OAuth, which enables Chameleon to receive the data.
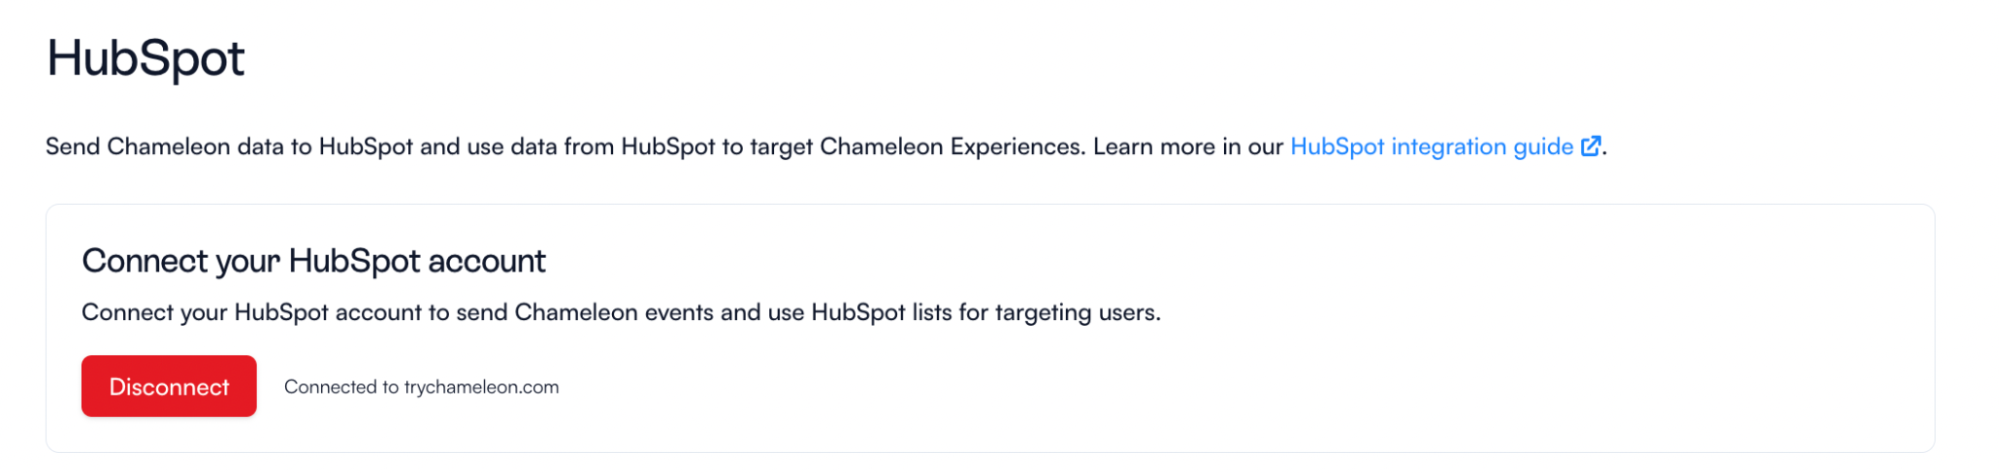 Add the name of your HubSpot list into the box and sync.
You’re also going to set up HubSpot as a data destination so that you can alert your sales team when these PQL leads take specific actions, set up triggered email campaigns, and track PQL-to-customer conversion.
Make sure you have HubSpot installed on the page where your Chameleon events will be displayed to users. Head to the Integrations page in your Chameleon Dashboard, toggle on “Send Chameleon data to HubSpot” and “Enable HubSpot scheduling modals” — now you can add a HubSpot scheduler link into your Experiences that directs users to book a call with your team.
Step 2: Target PQLs with in-app prompt
You’ll need to create the correct segment of users in Chameleon to target. Head to Segments in your Chameleon dashboard and add the filter of “HubSpot Lists”, “Contact lists”, “Is a member of”, and select the name of your PQL list.
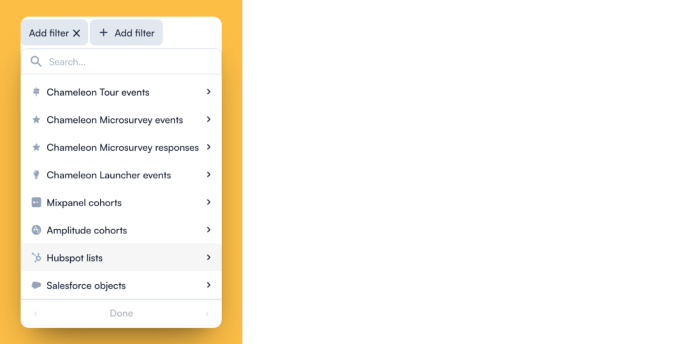
Then save your segment “PQLs”.
Next up, you’ll create the Modal in Chameleon — follow these steps:
Head to Tours in the Chameleon Dashboard, hit “Create a Tour” as an announcement, add a step, and enter the builder
Add in some copy to let users know what the value is of becoming a paying customer
Change the position to be bottom right and add an entry animation to catch the user’s attention
.png)
Adjust the primary button to say “Upgrade now” and add an Additional Action to “Open URL” with a link that directs users to your payment page in-app
Add a secondary button to say “Speak to our team” and then add HubSpot as an additional action, and add your scheduler link in there
Make sure both buttons link to “Complete Tour”
.png)
Once you’re happy with your design, head back to the dashboard to:
Select the environment to publish to and the audience as the “PQLs” segment
Select the recurrence to not repeat — in the next step we’ll retarget those who dismissed with an email
Define your goal as Tour completion so you can track users who clicked on either button
Choose when you want to set the Experience live, and publish 🚀
Step 3: Follow up with users who dismissed nudge
Now, you’re going to set up an email campaign in HubSpot that triggers to send when a user dismisses the Modal — you can use this as another opportunity to tempt them into upgrading.
Firstly, you’ll create properties in HubSpot as “TOUR DISMISSED” and “NAME OF TOUR”. In step 1, you already set up the integration so that Chameleon events sync with HubSpot, so once a user dismisses this specific Tour, their properties will automatically change. Watch this video for more info on how to set this up.
Next, you’ll create a workflow with the enrollment trigger as Contact Property has “TOUR DISMISSED” and “NAME OF TOUR”. Then you’ll add an action to “Send Email”, and create the email content you want to send. You might want to offer them a discount for upgrading now, or send more details on what they miss out on by not upgrading.
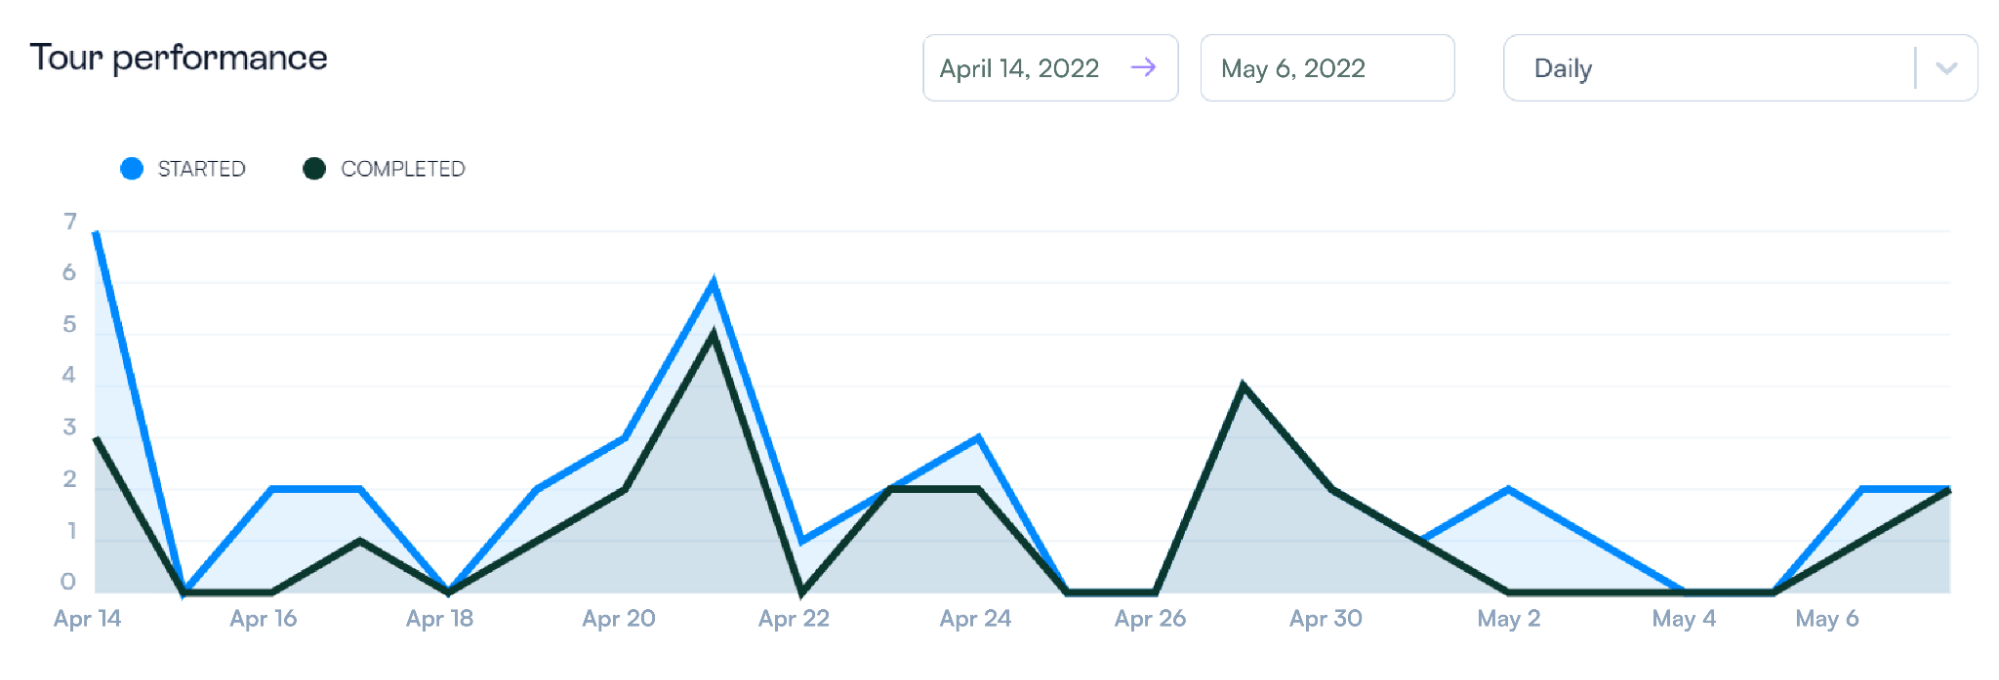
Step 4: Analyze metrics
Head to the Analytics tab of your Chameleon Tour to find your conversion rates from started Tour to completed Tour, and see your overall performance in graph format.
 You can also use a HubSpot funnel report to analyze how many of your PQLs have converted to customers, and use the filters of any Chameleon event properties you set up in Step 3 to dig into which Experiences drive the most conversions.
Conclusion
You’ve just set up a workflow to drive more conversions from PQL to customer by targeting "activated" users with an in-app upsell prompt, sending an email campaign to those that dismissed, and analyzing the results to help know where to place your efforts in future.
Now watch that revenue roll on in!
Learn more about what you can achieve with our HubSpot integration, or sign up free to try it out for yourself.
