


Improve webinar attendance rates with in-product registration
Introduction
There are many reasons why your users don’t sign up to your webinars - they don’t think the content is relevant to them, they abandon a registration process that takes too long, or they never even know about it in the first place.
How can you tackle all of these issues at once and drive more users to your webinars? Use the Livestorm and Chameleon integration to send a personalized in-app invitation to users, and enable them to register in one click. No need for a webinar landing page, no need for a registration form 😲 You heard right - just one click.
In this recipe, we’ll take you through how to use Chameleon and Livestorm to promote your onboarding webinar to new users in-app, and watch your registration rates go through the roof!
Let’s jump in.
Ingredients
Step 1: Create the webinar in Livestorm
Head to your Livestorm events dashboard to create a new event:
Give it a name, e.g. “Company Name 101: Getting started”, choose speaking permissions, date and time, and team members who will speak
Write some landing page copy
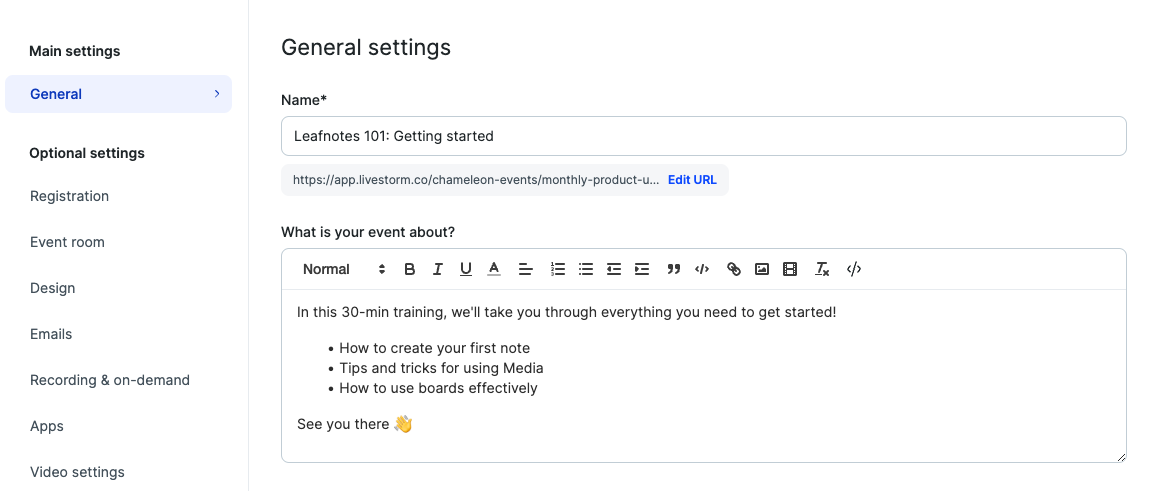
Update the design with your branding and logo for the emails and landing page, and head into the event room to change the design there

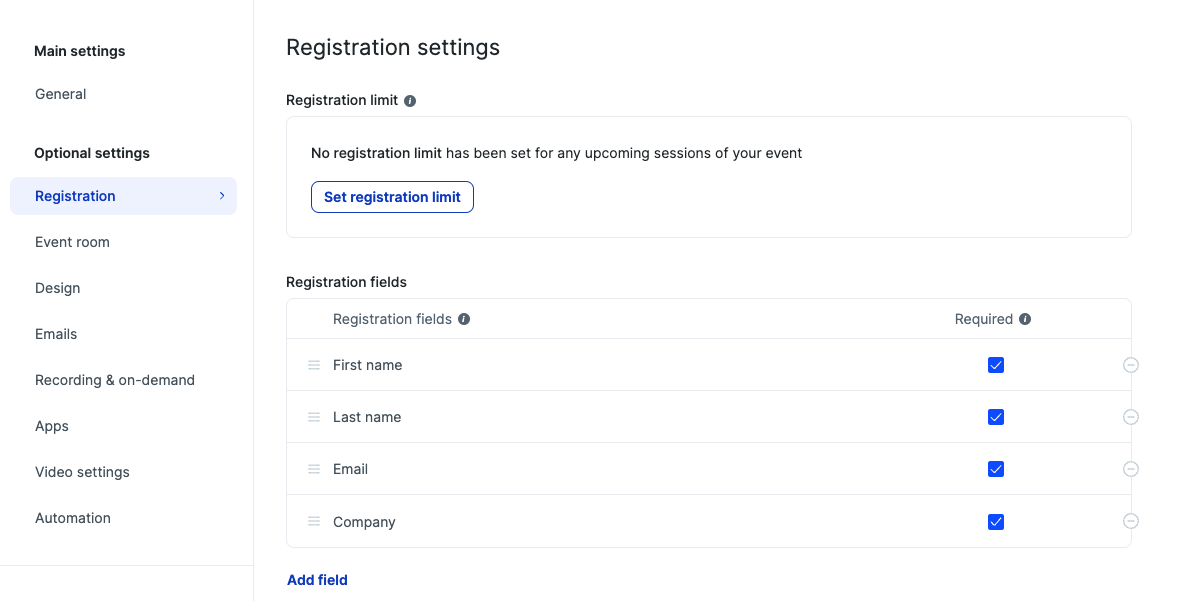
Add the registration fields you require, and choose any specific advanced settings
Change the event room details to enable or disable chat/polls
Choose the number of emails you want to send - we’d recommend the registration confirmation, 24-hour reminder, 1-hour reminder, and follow-up emails for those who did/didn’t attend
Select to automatically record upon start, and choose who has access to the recording
Step 2: Integrate Chameleon and Livestorm
Go to the App marketplace in your Livestorm account settings, generate a new API token and copy it.
Next, go to Integrations in your Chameleon dashboard, find the Livestorm integration, and click “Connect”. Then enable the Livestorm integration, and paste the API token in here.
 Voila! Now you can add your Livestorm registration link to any Chameleon button or media component.
Step 3: Create target audience
Next, we’re going to create the segment of new users to promote your onboarding webinar to - those that have signed up in the last 2 weeks, but are not currently on a trial. Head over to Segments in the Chameleon dashboard. Hit "Create a Segment" and add the following filters:
In trial is missing
First seen by Chameleon is within the last 14 days (or the relevant number of days for your onboarding process)
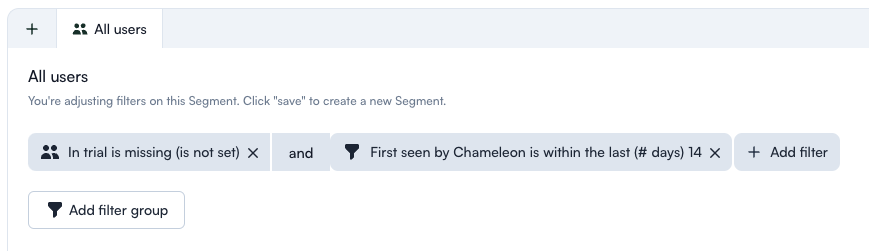 Click Save as, and give it a name, e.g. “New users onboarding webinar”.
Step 4: Create your webinar invite banner
Now it’s time to build the Experience you’re going to display to users! Follow the steps below:
Head to Tours in the Chameleon dashboard, click “Create a Tour”, give it a name, e.g. “New users onboarding webinar”
Choose Banner as the Tour type and enter the builder
Choose whether you want to position the banner at the top, bottom, or side
Personalize the copy
Edit the primary button so users can sign up in one click. Add copy “Sign up now”, click on “Add action”, select Livestorm, copy the session ID in Livestorm app, paste it into the box, add relevant UTMs
Edit the secondary button so users get directed to the Livestorm page if they want to find out more info before they sign up. Add copy “Learn more”, click on “Open URL”, copy the landing page link in the Livestorm app, paste it into the box.
Make sure both buttons have Complete Banner as “Yes” so that it disappears once they’ve clicked on either.

Head back to the dashboard and choose the environment you want to publish to
Select the target audience as the segment we created earlier: “New users onboarding webinar”
Choose for the recurrence to not repeat - this Experience is only relevant this one time
Set your Experience live!
Step 5: Analyze your results
Analyze which Chameleon Experiences were the most successful - either in Livestorm or by downloading to CSV or Google Drive from your Chameleon dashboard.
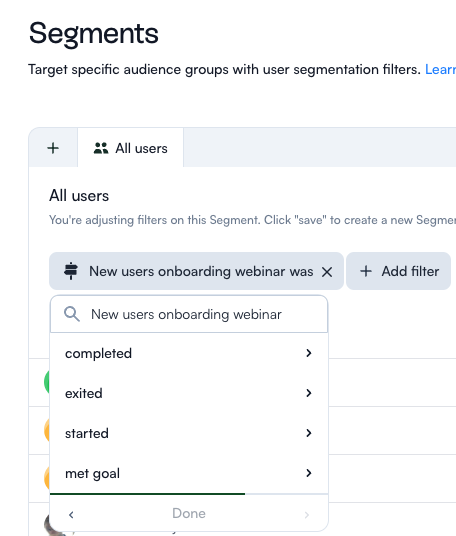
 You can then use this data in when targeting users for future webinar invitations. For example, when setting up a segment, you can use the filter “Chameleon Tour events”, “New users onboarding webinar”, “Was completed” vs “Was exited”.
Conclusion
You’ve just successfully promoted your webinar to new users in-app, personalized the copy to make it relevant to them, and reduced the friction to sign up - all adding to a supportive onboarding experience that will help keep your users around for the long-term.
Check out more ways you can use the Chameleon and Livestorm integration to help customers engage with your content, or book a demo with our of our product experts.
