


Bring prototype testing into your app
Introduction
Let’s imagine you’re designing a new product feature or redesigning one of your existing product features - you know how you want it to look but how do you know what your users want?
That’s where prototype testing comes in! Having your users test out the new design flow between interfaces, and getting their feedback, is crucial to validating your ideas.
What if you could recruit users, conduct testing, and get feedback, all in one place… in under 10 minutes? That place exists and it’s right inside your product - where you’re going to get the most contextual and relevant information from your users.
In this recipe, we’ll take you through how to conduct prototype testing, and then gather immediate feedback, to help you iterate fast and launch designs that give your users what they really want.
Ingredients
A Chameleon account (any plan)
A Figma account (any plan)
Step 1: Create your prototypes in Figma
Already have your prototype set up in Figma, or know how to create one? Head directly to step 2!
If not, start by creating your designs, with one for each new interface, and organize them to be in the flow that users will see them. Make sure you highlight where users should click to transition to the next interface - you could use a brightly colored border or a mouse icon.

Then switch from “Design” to “Prototype” view in the top right-hand corner of Figma.
 On the first design, click on the feature that you want to connect with the second design - this will be what users need to click on to transition between the two.

An arrow will appear - click on the arrow and drag it to the second design.
Do the same for all of your designs.

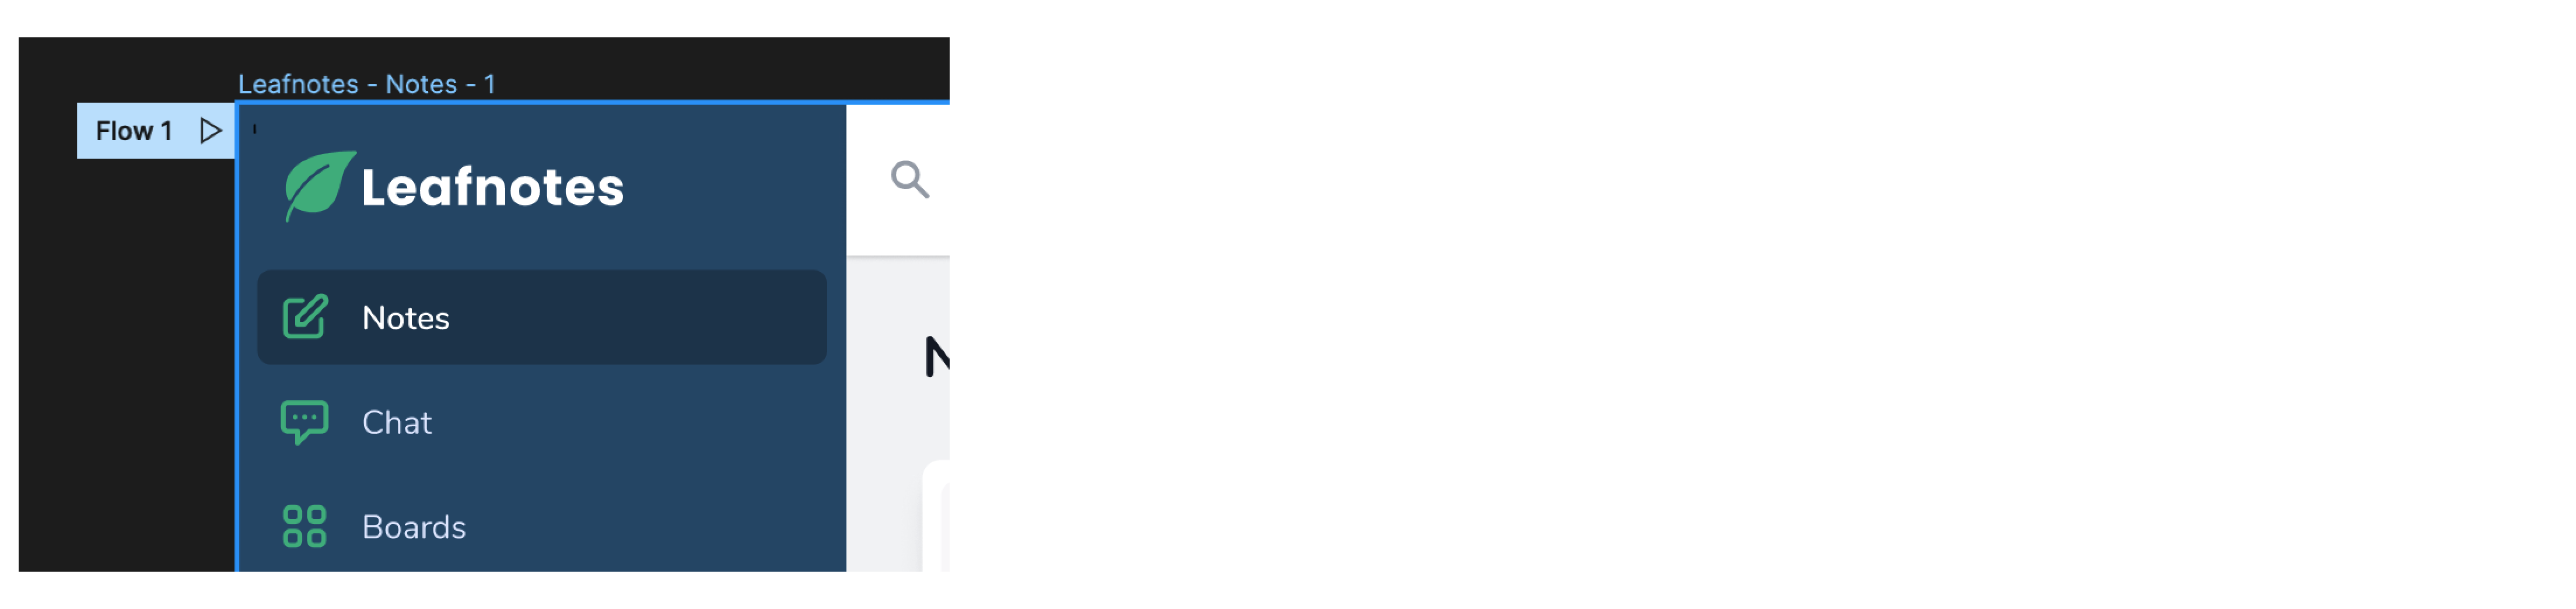
You can preview what this looks like for users by clicking on the “Flow 1” arrow attached to the first design.
 For more handy tips, check out this guide to creating prototypes by Figma.
Step 2: Integrate Chameleon and Figma
Head to Integrations in your Chameleon dashboard, find the Figma integration, and click “Connect”.
Then click “Enable” to connect the integration - this allows you to display your Figma design or prototype when a user clicks on a button or image within a Chameleon Tour step.

Step 3: Build Tour Modal
Now it’s time to create the Experience to show off your Figma prototype!
First, you’ll need to create a relevant target audience to show the Experience to. In this recipe, the redesigns we’re showing are for main features which will be used by the majority of users, so you’ll want to include as many of these as possible.
You’ll also want to make sure the users are active and engaged so that they have enough experience with your product to give reliable feedback in comparing the old and new interfaces, and provide insights into what they expect from feature developments.
Head to “Segments” in the Chameleon dashboard, and add the following filters:
“Last seen” is within the last 14 days
“Number of web sessions” is more than 20
First seen by Chameleon is not within the last 7 days
“In trial is missing” to exclude trial users
 Then hit “Save/Save As”, give it a name, e.g. “New design prototype announcement”, and create your new segment.

Next up, follow these steps to create the Experience in Chameleon:
Head to Tours in the Chameleon dashboard, hit “Create a Tour”, give it a name, e.g. “New design prototype announcement”
Choose Announcement as the Tour type
Click “Add Step”, select the Modal template, and enter the builder
Adjust the color and width, and add in some text - remember that you want to make the user feel valued and encouraged to leave feedback
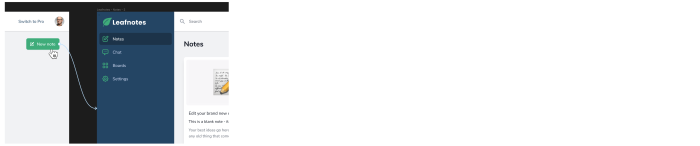
Add an image as a sneak peek to the design
Click on the primary button, and add an additional action as “Figma”
Head to Figma and click “Share prototype” in the top right-hand corner, and copy the link, enabling the setting so that anyone with the link can view.
Click preview to see what it looks like to your users
Head back to the dashboard and choose the environment you want to publish to
Select the target audience as the segment we created earlier: “New design prototype announcement”
Choose for the recurrence to not repeat - this Experience is only relevant this one time
Set your Experience live!
Step 4: Launch Microsurvey to get feedback
First, you’ll need to create a segment of users so that you only show your Microsurvey to those who have completed the Tour and seen your Figma prototypes.
Navigate to Segments, add a filter, select “Chameleon Tour Events”, and search for and select the name of your Tour, include “was completed ever”.
 Click “Save”, and give it the name “New design prototype feedback”.
To design your Microsurvey, follow these steps:
Head to Microsurveys in Chameleon dashboard, hit “Create a Microsurvey”, give it a name, e.g. “New design prototype feedback”
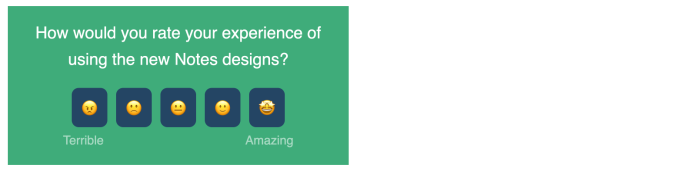
Select rating Microsurvey so your users can share their overall opinion and then have space to give deeper feedback
Add a Step, and enter the builder
Adjust the colour to be the same as your modal
Add in a question to get their overall opinion
Add a comments step and customize the copy for each of the responses. For unhappy or neutral users, you can ask questions like “How could we improve?” and “What did you find challenging?”. For happy users, you can ask questions like “What did you find easy? What did you enjoy the most?”
Add a thank you step to express gratitude and advise users what you’ll do with the results
-1683890367.png)
Head back to the dashboard, choose the environment you want to publish to
Select audience and choose the segment we created earlier “New design prototype feedback”
Choose the recurrence to not repeat - we don’t want users seeing this Microsurvey again
Hit publish!
Step 5: Analyze results
Go to the Chameleon Dashboard where you can review the summary of the ratings and individual responses to the survey questions.
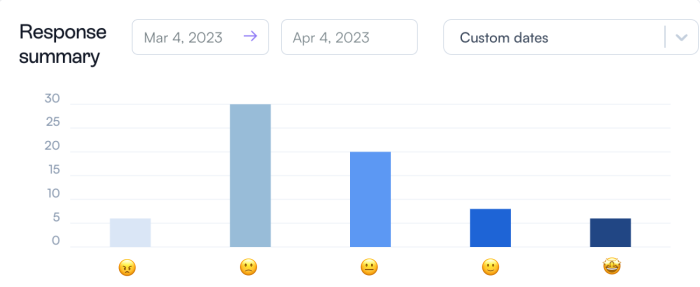
This feedback will be invaluable in helping you get rapid feedback on what your users like and don’t like about your designs, to make sure the feature is valuable to them once released. You can also use the comments to personalize the feature launch announcements and help increase adoption.
Conclusion
Congrats - you’ve just completed the prototype testing process from start to finish, all within your app 👏 You can sleep easy tonight knowing that you’re building user-centric feature designs your users really want!
You can also use the Figma and Chameleon integration to announce product updates once they’re live, show off new features, and share your product roadmap. For more tips about how to use Chameleon and Figma together, schedule some time with our product experts.
